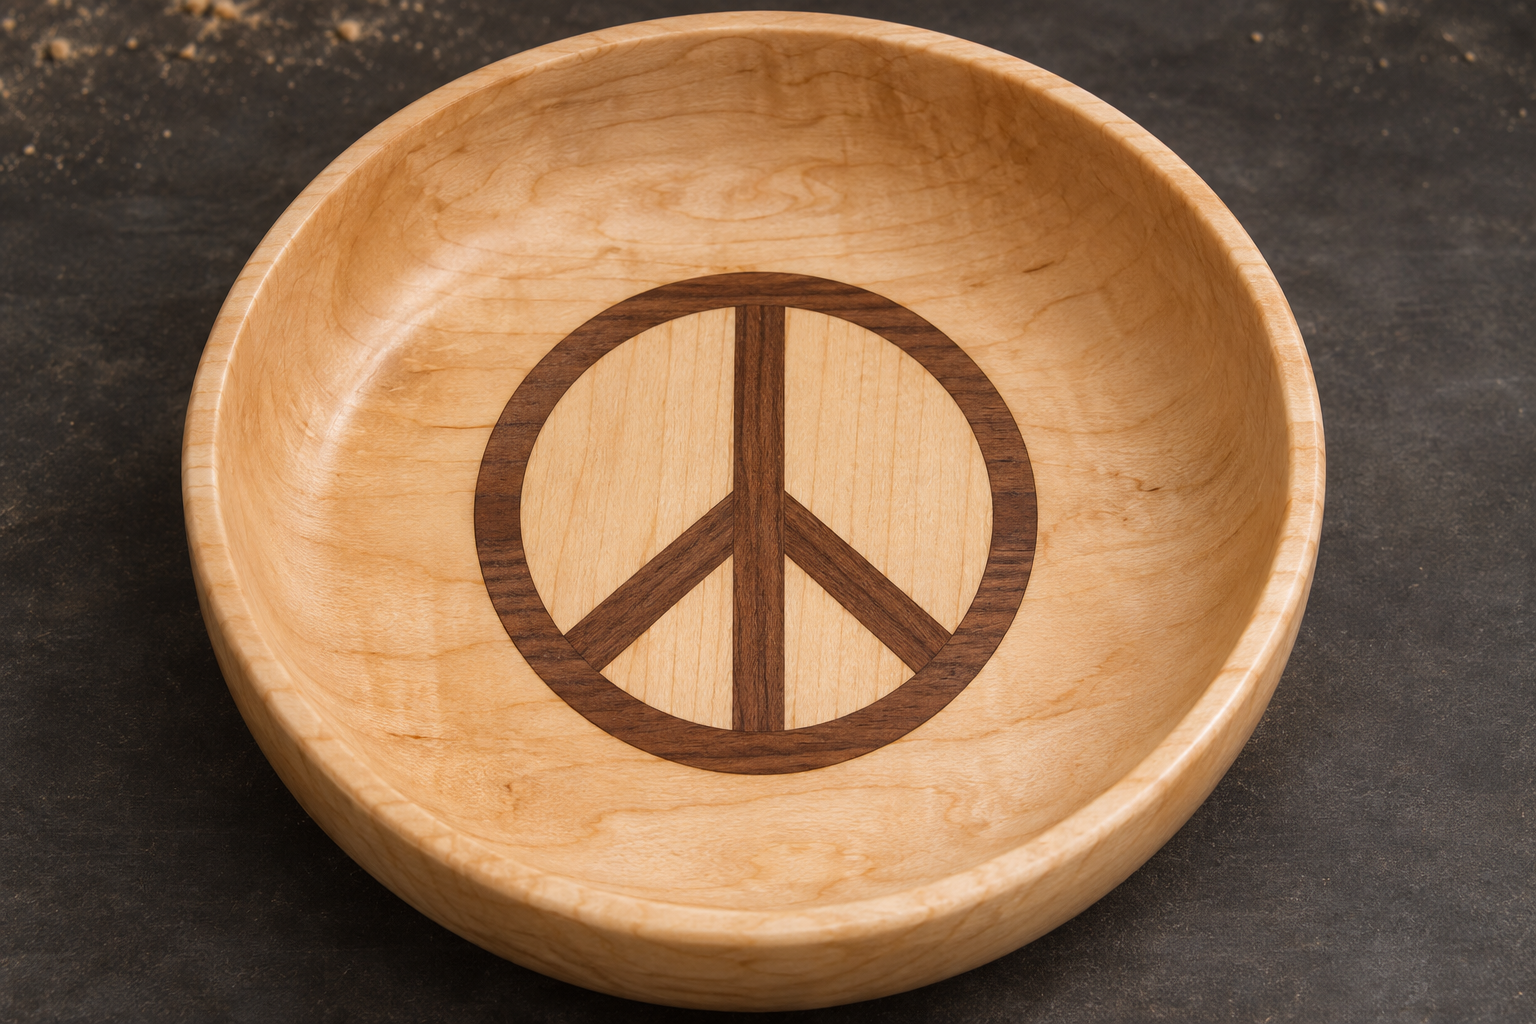
Finished concept · AI visualization, not a completed shop build.
8 inFinished diameter
1¾ inFinished height
3½ inMedallion diameter
8 stepsSeveral sessions + glue cures
A plan for the first build. This is an original proposed design, not a shop-tested plan. Prove the medallion in scrap first. Dimensions are targets; fit the actual pieces and verify your lathe and workholding before turning.
Understand the construction
Small pieces. One peaceful whole.
Build the symbol as a separate medallion. Its walnut carrier creates the outer ring and supports the thin pattern from underneath.
MapleWalnut
The finished surface
The detail is in the center.
A 3-inch patterned center sits inside a 3½-inch walnut carrier. Its ¼-inch rim completes the peace sign. Everything finishes flush with the bowl floor.
Design dimensions
Peace-sign bars
¼ in wide · 45° diagonals
Complete medallion
3½ in diameter × ⅜ in thick
Flat central floor
At least 3¾ in diameter
Solid base below insert
At least ⅜ in
Diagram dimensions are nominal. The concept photo is illustrative; use the pattern and measured parts for construction.
Prepare the workbench
Start with good wood.
The stock list
Check off what you have. Progress stays in this browser.
The tools for this build
A small lathe, a bandsaw or suitable hand saw, and accurate fitting tools do the important work.
Bowl turning: appropriate lathe, bowl gouge, suitable faceplate or chuck, and a workholding method you know.
Layout & fitting: ruler, square, 45° jig, calipers or depth gauge, pencil, and a flat sanding surface.
Glue-ups: clamps, flat cauls, and sound sacrificial glue blocks sized for your faceplate.
Protection: face shield, dust control, suitable respiratory and hearing protection. No gloves at the lathe.
About the compact lathe The workshop reference shows a small Central Machinery benchtop lathe. The exact model is unconfirmed. Verify its manual, actual clearance, and speed range before using this blank.
Metric stock sizes are rounded equivalents. The PDF and cutting layout use inches; finish dimensions and fit take priority over rounded conversions.
From stock to finished bowl
Let’s make it.
One step at a time. Mark a step complete only after its checks and glue cures are finished.
Step 1 of 8 · Plan the blank
A small bowl. A deliberate first setup.
Read the complete plan before cutting. This is an original, untested design: build a scrap medallion first to prove the joinery, fit, and workholding.
Choose dry, acclimated, sound maple and walnut. Mark one common grain direction on the pattern pieces, walnut carrier, and bowl. Keep those grain directions parallel; the diagonal bars are cut diagonally across the same grain direction.
Start with an 8½ × 8½ × 2½-inch bowl blank. Bandsaw it to an approximately 8½-inch circle before mounting. Its original square corners span about 12 inches.
Confirm the actual lathe model, clearance, manual, mounting, and minimum speed. With power disconnected, rotate the mounted blank by hand to check the bed, banjo, and tool rest. The 8-inch target is conditional on that check.
Ready whenStock is sound and dry, grain arrows agree, and your chosen bowl mounting and rounded blank clear the actual machine.
Keep the face shield on while turning, with no gloves or loose clothing. Use bowl-appropriate tools and workholding you already know; stop for vibration or a suspect glue joint.
Step 2 of 8 · Cut the pattern
Seven pieces make the center.
Print page 2 of the PDF at Actual size / 100%. Measure the 2-inch scale bar. The 4-inch square is an oversize assembly; the dashed 3-inch circle is the final center-disc boundary.
From ½-inch stock, cut four maple fillers (A–D) and three walnut bars: the central stem (1) and two diagonals (2 and 3). The finished bars are ¼ inch wide, measured perpendicular to their length.
Cut on the waste side of every line and true the mating faces. The printed lines are finished joint boundaries, not blade centers. Use supported bandsaw or hand-saw work; avoid freehand cuts on tiny table-saw pieces.
Dry-fit the full panel on a flat surface. The diagonal inner ends butt against the full vertical bar. Close each joint with light hand pressure before reaching for glue.
Check the fitThe seven pieces sit flat, the diagonal bars are 45° to the stem, and every joint closes without heavy clamping.
A visible gap needs a better fit. Do not depend on thick glue to repair a structural turning joint.
Step 3 of 8 · Glue the center
Flat faces now save trouble later.
Glue A + 2 + C as the left half, and B + 3 + D as the right half. Use flat protected cauls and modest, even pressure; keep each half flat.
Let those joints cure fully. True the two inner edges so each half meets the long vertical walnut bar (1) without gaps.
Glue the two halves to bar 1, keeping all grain arrows parallel. Keep glue squeeze-out from bonding the assembly to your cauls.
Follow the adhesive label for temperature, clamping, and cure. Allow at least 24 hours before stressing a PVA glue-up; longer may be needed in cool or damp conditions. Repeat the cure interval after each new glue-up.
Ready to turnBoth glue stages are fully cured. All parts are bonded over sound, flat mating faces.
Clamping time is not full cure time. A glue-up can feel dry long before it is ready to spin.
Step 4 of 8 · Turn the center disc
Round the pattern with full support.
Prepare a flat, sound sacrificial glue block attached to a faceplate with suitable screws held entirely within sacrificial wood. Use an established full-face glue-block method; inspect the bond and let it cure fully.
With the pattern panel supported by that block, turn the perimeter into a nominal 3-inch circle centered on the symbol. Use light cuts and the lowest suitable speed allowed by the setup.
Stop the lathe. Remove the entire faceplate and work assembly before separating anything. Handsaw through sacrificial waste off the lathe, then flatten the back carefully.
Leave the patterned disc around ¼ inch thick for fitting. Its finished thickness will become about 3/16 inch after it is glued into the carrier and skimmed level.
Keep the referenceMeasure and label the actual disc diameter. The carrier pocket is fitted to this disc, not to an assumed exact 3 inches.
Do not grip the thin disc by its edge or part it free while spinning. The full-face backing is part of the workholding.
Step 5 of 8 · Make the walnut carrier
The ring and the backing are one piece.
Mount the walnut carrier stock on a separate, fully bonded sacrificial glue block. Turn a flat-bottom pocket about 3/16 inch deep, sized to the actual center disc.
Aim for an easy slip fit: the disc should seat fully without force or rocking. Dry-fit first. A tight press fit can split the carrier.
Align the grain, apply wood glue to the mating surfaces, and seat the patterned disc. Use a flat caul with even pressure. Its roughly ¼-inch thickness leaves about 1/16 inch proud of the 3/16-inch pocket.
After full cure, lightly skim the center level with the walnut face and turn the outside to about 3½ inches. This leaves an approximately ¼-inch-wide walnut ring.
Remove the whole assembly from the lathe. Handsaw through sacrificial waste and flatten the back to an overall thickness near ⅜ inch. Preserve about 3/16 inch of solid walnut beneath the patterned center.
Your finished insertA flat, solid-backed medallion: about 3½ inches across and ⅜ inch thick. Measure its actual diameter and thickness for the bowl recess.
The ring must stay attached to the walnut backing. Do not cut it as a loose, unsupported ring.
Step 6 of 8 · Turn the bowl
Leave room for the insert beneath the floor.
Using a suitable bowl mounting, shape the rounded maple blank to about 8 inches diameter and 1¾ inches finished height, excluding any temporary mounting allowance.
Hollow a shallow interior about 1 inch deep, leaving walls around ⅜ inch. Blend the curve into a flat central floor at least 3¾ inches across.
Keep roughly ¾ inch of solid bowl wood beneath that floor before cutting the medallion recess. Measure the true remaining base; do not count a temporary tenon or waste block.
Keep the central landing flat. Finish most of the interior shaping before fitting the medallion, so later hollowing does not remove the thin patterned face.
Measure before recessingAt the intended recess, floor thickness minus actual medallion thickness must leave at least ⅜ inch of solid bowl wood.
The outside dimensions are design targets, not a substitute for caliper checks. Adjust the interior depth to preserve the base.
Step 7 of 8 · Fit the medallion
Make the pocket to the piece you have.
Measure the completed medallion. Cut a flat-bottom circular recess that fits its actual diameter and thickness, approximately 3½ inches across and ⅜ inch deep.
Stop frequently to check depth and remaining base thickness. Keep at least ⅜ inch of solid maple below the recess, measured to the finished underside.
Dry-fit for full support with no rocking or force. Align the medallion grain with the bowl grain. Leave the medallion just slightly proud for a light final skim.
Apply glue to the mating surfaces, seat the medallion, and clamp gently with a flat caul. Let the entire bond cure fully before any more turning.
Before the glueThe fit is an easy slip fit, the bottom fully supports the insert, and the required solid base remains.
If the recess is too deep or the base is too thin, stop and revise the bowl. Glue does not restore the missing structural wood.
Step 8 of 8 · Finish & enjoy
Let the wood do the talking.
After full cure, take only light finishing cuts to make the medallion flush with the floor. The patterned center is about 3/16 inch thick; avoid further hollowing through it.
Sand through an appropriate sequence for your chosen finish, removing scratches from the previous grit. Avoid heat and dust buildup. Keep abrasives and fingers clear of sharp edges and chuck jaws.
Remove the temporary mounting allowance using a suitable supported method. Preserve the intended solid base beneath the insert and verify the bowl sits level.
Apply a finish suitable for decorative wood objects according to its label, including drying and cure. Record the actual measurements and what you would change on the next build.
Finished resultThe peace sign is flush, the transitions feel smooth, and the bowl rests flat. Give the finish its full cure before display.
This plan is for a decorative bowl. Do not assume a decorative finish or untested construction is suitable for food use.
1 / 8
Checks are stored only in this browser, with no account needed.
Measure before you cut
Protect the bottom.
The insert needs room. Subtract recess depth from the solid bowl-floor thickness before the recess is cut.
Remaining base calculator
Enter measured values in inches, using decimals.
⅜ in remaining
Meets the plan’s minimum base thickness. This checks one dimension only.
What counts as solid wood?
Measure to the finished underside of the bowl. A chucking tenon, faceplate block, or other waste that will be removed does not count.
The plan starts with roughly ¾ inch under the floor. A ⅜-inch-deep medallion recess then leaves ⅜ inch of solid maple. Use the insert’s actual thickness when planning its recess.
This calculator is a subtraction check, not approval of a blank, mounting, glue joint, or turning speed.
Details that make a difference
Before the next cut.
Why make a separate medallion?
You can fit the tiny pattern pieces on a flat bench and round the whole panel with backing support. The walnut carrier turns the finished ring and backing into one solid component. The bowl only needs one circular, flat-bottom recess.
Can I use a deeper bowl or a larger symbol?
That changes the geometry and remaining thickness. This version uses a shallow interior, a flat center at least 3¾ inches across, and at least ⅜ inch of solid bowl wood beneath the recess. Treat a different size as a new design to work out and test.
What if a pattern joint has a gap?
Re-fit or replace the part before glue-up. A gap filled with glue or dust is not a substitute for a tight, sound turning joint. The printed pattern provides finished joint lines; saw on the waste side and true to fit.
Why keep all the grain parallel?
Dry wood still moves with changes in humidity. Keeping grain directions aligned reduces conflicting cross-grain movement in this flat assembly. Do not rotate grain to follow the two diagonal bars, even if a concept image appears that way.
How long will the project take?
Plan several shop sessions rather than one afternoon. The center has staged glue-ups, the glue-block mountings need full cure, and the carrier and bowl insertion each need another cure. For PVA, allow at least 24 hours before stressing each bond, or longer when the adhesive instructions or conditions require it.
Is the reference video a demonstration of this project?
No. Rusty’s workshop video shows the compact lathe in another project. It helps identify the machine’s general form; it does not verify its model or demonstrate this bowl build.
Take it to the shop
The plan. On paper, too.
Three pages with the design, starting stock, a full-size center pattern, and the build sequence.