Small gaps distinguish this design from a solid privacy fence.
Project library / Structures
Structures / Design study
Spaced Board Fence
Vertical boards with small gaps cover horizontal rails housed into upright timber posts.
Advanced5 stages4-page source
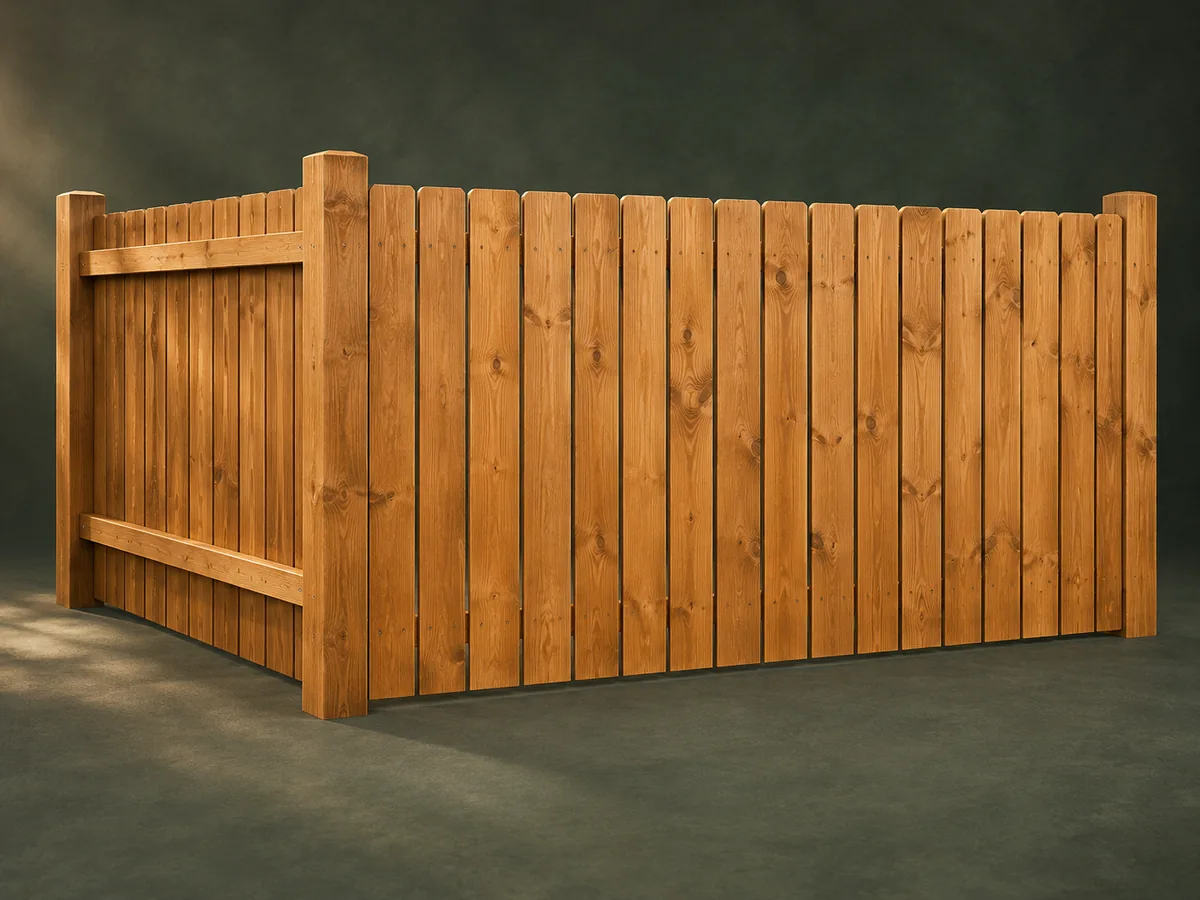
Design review required. Historical fence layout only. Boundary, service location, local restrictions, wind loading, post foundations and any house connection require site-specific review. This guide has not been shop-tested.
Understand the project
What makes this build.
Rail housings and board spacing are straightforward, but fence foundations, wind resistance and any house connection are site-specific.
Horizontal rails are let into post housings.
Board spacing is set with a reusable spacer.
Points to resolve before building
- Site conditions govern post size, depth and anchoring.
- Do not fasten an end post merely to house siding; a reviewed structural and weatherproof connection is required.
Prepare the workbench
Materials & tools.
Check what you have, then confirm stock sizes and hardware against your chosen dimensions.
Materials checklist
Tools & operations
- Post-hole tools
- Level
- Mason’s line
- Circular saw
- Chisels
- Drill
Tool choices may include practical editorial suggestions. Use workholding and guarding appropriate to the actual machine and operation.
Choose dry, sound stock and test unfamiliar joints in scrap. Keep guards, push aids, eye protection, and dust control appropriate to the work.
Keep the numbers close
Measurements to know.
Selected dimensions verified from the source. This is not an automatically scaled cutting list.
| Illustrated board gap | ½ in | Source p. 4 |
|---|---|---|
| Suggested post spacing | About 6 ft; subject to site design | Source p. 2 |
Printed diagrams and concept images are not scale references. Verify measurements, material thickness, hardware fit, and allowances before cutting.
Inches to millimeters
Convert a measurement without changing the design. Enter a decimal or a fraction, such as 1 3/8.
Nominal lumber names and actual finished sizes are different. Converting units does not choose a substitute stock size.
Read, assess & plan
Explore the construction.
Review stages explain the historical design and unresolved decisions; they are not approval to build or use it.
Establish the site requirements
- Locate boundaries and underground services, then resolve local fence limits, wind loading and footing requirements. Set out the approved line before digging. Include corners and any future gate opening in the layout, because these positions may need different post and connection details.
Before moving onThe fence line and foundation design are confirmed.
Set corner references
- Use the corner locations to establish a taut reference line. Follow the reviewed foundation depth and drainage detail rather than treating the historical generic instruction as universal. Use a line and level together so a straight fence in plan does not conceal leaning posts.
Before moving onCorner posts are plumb at the correct finished height.
Lay out rail housings
- Mark the lower rail above the ground and transfer a consistent level to each post. Cut the specified housings only if their effect on post strength is included in the design. Mark the upper and lower limits of each housing before cutting, then pare the seat flat enough for full rail bearing.
Before moving onRail seats line up and retain adequate post section.
Install the horizontal rails
- Fit the lower and upper rails with joints supported at posts. Predrill and use suitable exterior fixings, including the reviewed corner connections. Keep rail ends supported at the corner joints and avoid driving screws so close to end grain that the wood splits.
Before moving onRails are secure and the fence line remains straight.
Space the boards
- Use a ½-inch spacer for the illustrated open-joint appearance. Check plumb repeatedly and adjust the last-board layout before fixing the entire run. Dry-plan the last few boards at the end of each run so an uneven leftover gap does not force a visibly narrow final board.
Before moving onGaps remain even and board bottoms clear the ground.
1 / 5
Progress and notes stay in this browser. Nothing is uploaded.
Source notes.
- Original PDF
- Basic Board Fence.pdf
- Source length
- 4 pages
- Attribution
- Collection copyright 2004 Martian Auctions; original authorship unverified.
- This edition
- 116 Studio · Original written companion and AI concept image · November 2026
Page references count from the first page of this PDF. The original is retained in the owner’s private woodworking collection; it is not distributed by this website. Consult it for full drawings, templates, and details beyond this companion.
Historical plans can omit essential context. Source references identify where a detail came from; they do not certify the design or replace current manufacturer instructions or applicable professional review.
More from this corner of the shop.
 Design study
Structures
A-Frame Garden Playhouse
A timber play structure combines an elevated roofed platform, sandbox, access ramp and swing beam.
Advanced6 stages
 Design study
Structures
Attached Deck Planner
A planning walkthrough for a post-and-beam timber deck attached to a house, with railing and steps.
Advanced5 stages
 Design study
Structures
Raised Deck and Stairs
An archival Georgia-Pacific deck layout with a projecting stair flight and coordinated timber guardrails.
Advanced5 stages