This is a utility building involving structure, water and electrical equipment.
Project library / Structures
Structures / Design study
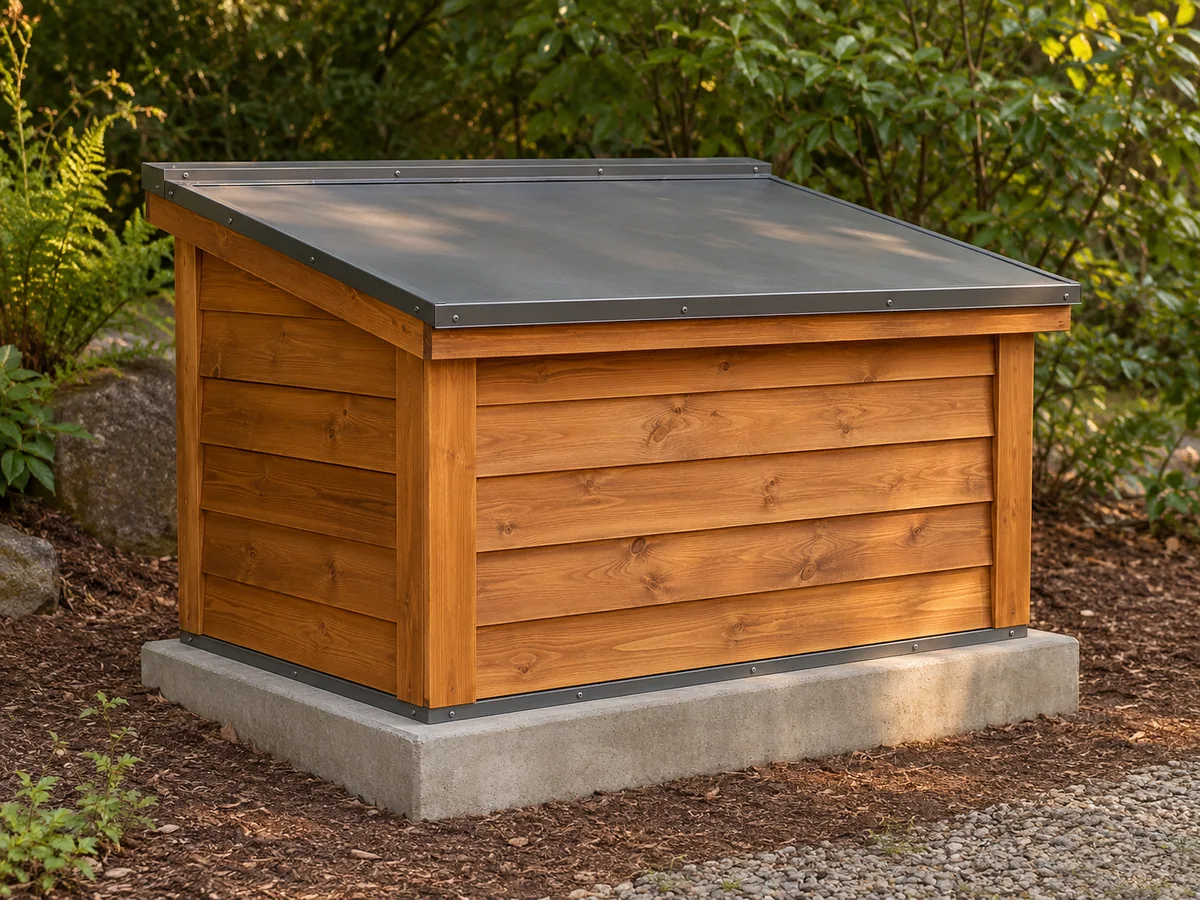
Insulated Pump House
A small insulated wood-frame enclosure with a hinged sloping roof and an optional removable wall panel.
Advanced6 stages4-page source
Design review required. Planning overview, not a shop-tested or construction-ready plan. Planning only: Midwest Plan Service explicitly requires professional adaptation. Historical wiring, heat-lamp, grounding and frost-protection details are not current installation instructions.
Understand the project
What makes this build.
This is a utility building involving structure, water and electrical equipment.
The single-slope hinged roof supplies maintenance access.
One wall may include a removable equipment-access panel.
Points to resolve before building
- Planning only: Midwest Plan Service explicitly requires professional adaptation.
- Historical wiring, heat-lamp, grounding and frost-protection details are not current installation instructions.
Prepare the workbench
Materials & tools.
Check what you have, then confirm stock sizes and hardware against your chosen dimensions.
Materials checklist
Tools & operations
- Measuring and layout tools
- Saw
- Drill
- Professional foundation, plumbing and electrical equipment
Tool choices may include practical editorial suggestions. Use workholding and guarding appropriate to the actual machine and operation.
Choose dry, sound stock and test unfamiliar joints in scrap. Keep guards, push aids, eye protection, and dust control appropriate to the work.
Keep the numbers close
Measurements to know.
Selected dimensions verified from the source. This is not an automatically scaled cutting list.
| Footprint | To fit the actual pump, motor and pressure tank; no universal finished size. | Source p. 3 |
|---|
Printed diagrams and concept images are not scale references. Verify measurements, material thickness, hardware fit, and allowances before cutting.
Inches to millimeters
Convert a measurement without changing the design. Enter a decimal or a fraction, such as 1 3/8.
Nominal lumber names and actual finished sizes are different. Converting units does not choose a substitute stock size.
Read, assess & plan
Explore the construction.
Review stages explain the historical design and unresolved decisions; they are not approval to build or use it.
Measure equipment and access
- Record tank, pump and motor clearances, service paths and replacement access. Use these to establish the enclosure footprint rather than scaling the picture.
Before moving onEquipment can be serviced and removed without dismantling critical utilities.
Commission the site design
- Have qualified local professionals review the foundation, frost depth, drainage, well protection and permitted utility work. The source explicitly requires adaptation to the site.
Before moving onApproved foundation and utility details exist before construction.
Lay out the enclosure panels
- Prepare the wood-frame wall and roof drawings around the approved footprint. Decide whether the illustrated removable wall panel is necessary for equipment access.
Before moving onWall panels leave the planned service opening.
Resolve insulation and ventilation
- Select a climate-appropriate wall and roof assembly with condensation control and required equipment ventilation. Do not copy the historic heat-lamp control circuit.
Before moving onThermal and ventilation requirements are documented by the relevant trades.
Detail the lifting roof
- Plan flashing, weather seals, safe hinges and a positive support for the raised roof. Verify that the roof can be lifted and held without exposing a person to a falling panel.
Before moving onA weather-tight access method and rated support are specified.
Complete professional inspection
- Have plumbing and electrical work installed and inspected under current requirements. Test weather shedding and service access after construction.
Before moving onRequired inspections are complete before equipment is energized.
1 / 6
Progress and notes stay in this browser. Nothing is uploaded.
Source notes.
- Original PDF
- Pump House.pdf
- Source length
- 4 pages
- Attribution
- Midwest Plan Service, MWPS-74001, Insulated Pump House.
- This edition
- 116 Studio · Original written companion and AI concept image · November 2026
Page references count from the first page of this PDF. The original is retained in the owner’s private woodworking collection; it is not distributed by this website. Consult it for full drawings, templates, and details beyond this companion.
Historical plans can omit essential context. Source references identify where a detail came from; they do not certify the design or replace current manufacturer instructions or applicable professional review.
More from this corner of the shop.
 Design study
Structures
Spaced Board Fence
Vertical boards with small gaps cover horizontal rails housed into upright timber posts.
Advanced5 stages
 Design study
Structures
A-Frame Garden Playhouse
A timber play structure combines an elevated roofed platform, sandbox, access ramp and swing beam.
Advanced6 stages
 Design study
Structures
Attached Deck Planner
A planning walkthrough for a post-and-beam timber deck attached to a house, with railing and steps.
Advanced5 stages