Rocking mortise-and-tenon joints let the cheeks tension the blade.
Project library / Workshop
Workshop / Build companion
Classic Wooden Bow Saw
An ash H-frame tensions a narrow saw blade with twisted cord and turned maple handles.
Advanced5 stages6-page source
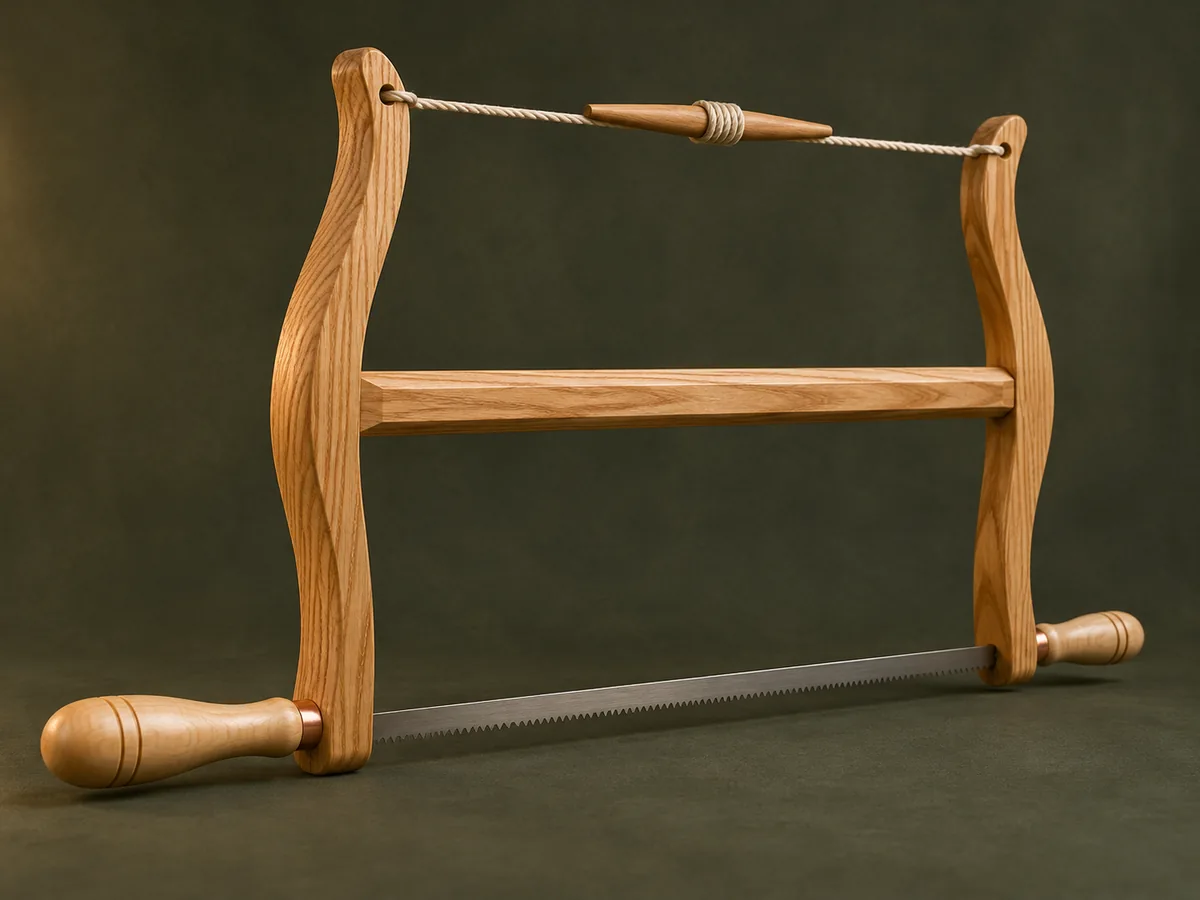
A companion to the original plan. An original study guide based on the supplied historical plan; not shop-tested. Use the privately owned source drawings for full-size patterns and complete cutting details.
Understand the project
What makes this build.
The frame must flex through rocking joints while retaining a tensioned blade, and the turned handles need accurately fitted metal parts.
One turned handle is longer than the other.
A central toggle twists the cord loop.
Points to resolve before building
- A tensioned frame stores energy; reject cracked or short-grained stock and overtightening.
- The historical improvised nail holders need careful material and fit assessment.
Prepare the workbench
Materials & tools.
Check what you have, then confirm stock sizes and hardware against your chosen dimensions.
Materials checklist
Tools & operations
- Bandsaw or coping saw
- Lathe
- Drill
- Chisels
- Spokeshave
- Metal saw and files
Tool choices may include practical editorial suggestions. Use workholding and guarding appropriate to the actual machine and operation.
Choose dry, sound stock and test unfamiliar joints in scrap. Keep guards, push aids, eye protection, and dust control appropriate to the work.
Keep the numbers close
Measurements to know.
Selected dimensions verified from the source. This is not an automatically scaled cutting list.
| Ferrule lengths | ½ in | Source p. 3 |
|---|---|---|
| Blade-pin hole in source | 3/32 in; reconcile with actual blade and fittings | Source p. 3 |
Printed diagrams and concept images are not scale references. Verify measurements, material thickness, hardware fit, and allowances before cutting.
Inches to millimeters
Convert a measurement without changing the design. Enter a decimal or a fraction, such as 1 3/8.
Nominal lumber names and actual finished sizes are different. Converting units does not choose a substitute stock size.
From stock to finished project
Let’s make it.
Read the complete sequence before cutting. Mark a stage complete after its fit checks and any required glue cure.
Select the blade and fittings
- Acquire the blade before setting the crossbar length. Establish compatible secure blade holders and pins rather than assuming any nail stock is suitable. Check the blade’s attachment-hole position as well as its overall length before establishing the spacing between the cheeks.
Before moving onThe blade attachment and required span are known.
Shape the cheeks and crossbar
- Transfer the curved cheek profiles and cut the crossbar. Refine with a spokeshave and preserve straight grain through the heavily stressed ends. Chamfer the crossbar and soften the curved cheeks without weakening the narrow areas near the cord and blade holes.
Before moving onBoth cheeks match with no short-grain weakness.
Fit rocking joints
- Cut the crossbar tenons and cheek mortises, then round the tenon ends enough to allow the described slight rocking motion. These joints must not lock the frame rigidly. Round the tenon ends gradually and keep enough shoulder contact to locate the frame while allowing its tensioning motion.
Before moving onThe frame adjusts smoothly under gentle hand pressure.
Turn the handles
- Turn the long and short handles to fit the selected ferrules. Drill centered axial holes using a secure setup and fit the ferrules without splitting the wood. Polish and deburr the ferrules before fitting them so their rims do not cut the wood or the user’s hand.
Before moving onHandles rotate and seat as intended.
Install and tension the blade
- Fit the blade and retention pins, then wrap and tie the cord loop. Twist with the toggle gradually, stopping well before frame distress or excessive blade tension. Keep the toggle seated against the crossbar after tensioning and release tension before changing the blade or inspecting its fittings.
Before moving onThe blade is straight, retained at both ends and stable under modest test cuts.
1 / 5
Progress and notes stay in this browser. Nothing is uploaded.
Source notes.
- Original PDF
- Bow Saw.pdf
- Source length
- 6 pages
- Attribution
- Collection copyright 2004 Martian Auctions; original authorship unverified.
- This edition
- 116 Studio · Original written companion and AI concept image · November 2026
Page references count from the first page of this PDF. The original is retained in the owner’s private woodworking collection; it is not distributed by this website. Consult it for full drawings, templates, and details beyond this companion.
Historical plans can omit essential context. Source references identify where a detail came from; they do not certify the design or replace current manufacturer instructions or applicable professional review.
More from this corner of the shop.
Workshop
Adjustable Studio Easel
A tall H-frame easel has a pegged canvas shelf, sliding top clamp and hinged rear tilt supports.
Intermediate6 stages
Workshop
Angled Router-Bit Shelf
A sloping drilled shelf presents router bits and other shanked accessories against a wall backboard.
Beginner5 stages
Workshop
Bolted Plank Workbench
A heavy two-plank worktop rests on housed bolted end frames with a narrow slatted shelf below.
Intermediate5 stages