The front pivots near its lower edge.
Project library / Boxes & small projects
Boxes & small projects / Build companion
Drop-Front Bread Box
A pine kitchen box has curved side cheeks and a solid front that pivots down on small wooden pins.
Intermediate5 stages3-page source
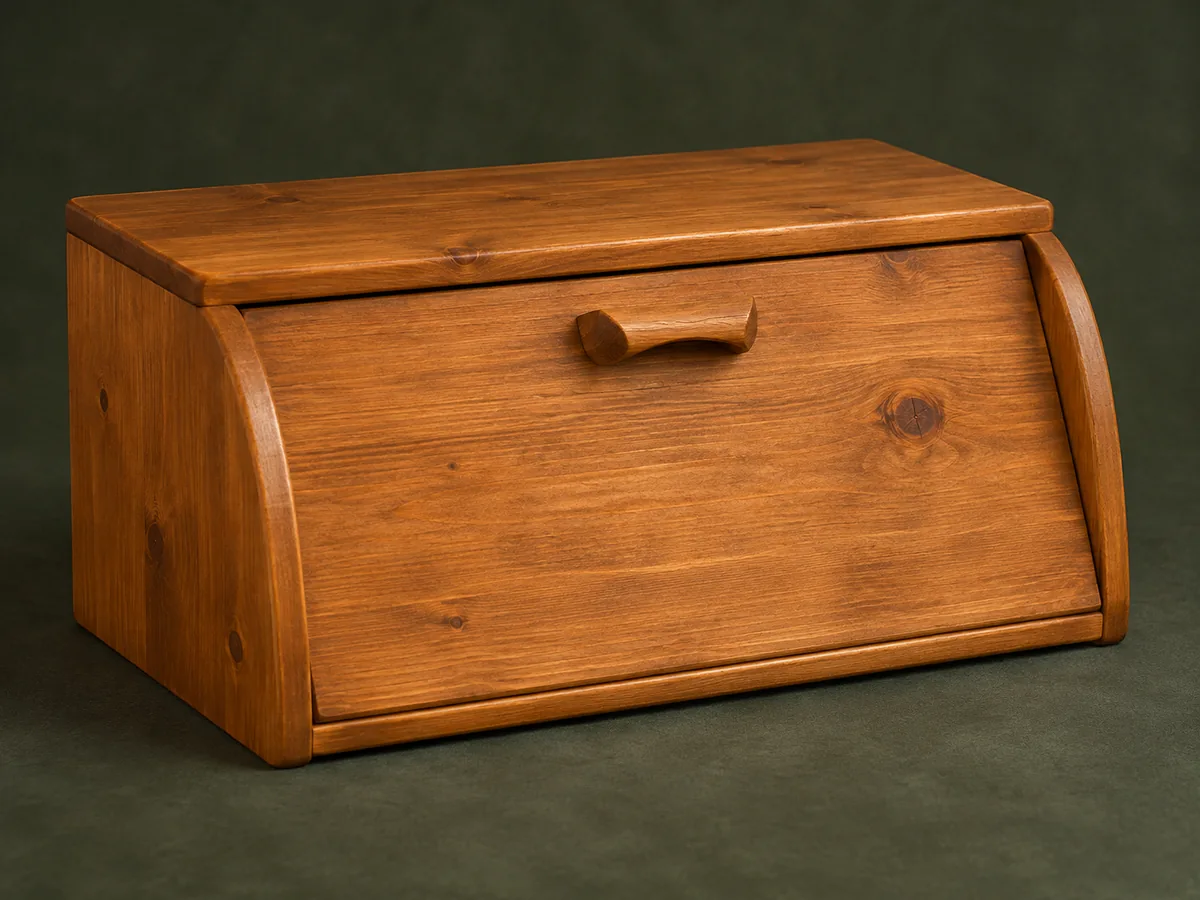
A companion to the original plan. An original study guide based on the supplied historical plan; not shop-tested. Use the privately owned source drawings for full-size patterns and complete cutting details.
Understand the project
What makes this build.
The pivot dowels and rounded door bottom must align precisely so the front opens without binding against the base.
Curved side cheeks extend above the top.
The plywood back is captured in grooves.
Points to resolve before building
- Do not glue the door to its pivot dowels.
- Food-storage finish and ventilation choice need consideration for actual conditions; the plan is not a preservation standard.
Prepare the workbench
Materials & tools.
Check what you have, then confirm stock sizes and hardware against your chosen dimensions.
Materials checklist
Tools & operations
- Jigsaw
- Router
- Drill
- Clamps
- Sander
Tool choices may include practical editorial suggestions. Use workholding and guarding appropriate to the actual machine and operation.
Choose dry, sound stock and test unfamiliar joints in scrap. Keep guards, push aids, eye protection, and dust control appropriate to the work.
Keep the numbers close
Measurements to know.
Selected dimensions verified from the source. This is not an automatically scaled cutting list.
| Base | ¾ × 10¾ × 18⅝ in | Source p. 2 |
|---|---|---|
| Door | ½ × 8⅛ × 18⅝ in | Source p. 2 |
| Top front bevel | 80° source cut angle; verify against drawing | Source p. 2 |
Printed diagrams and concept images are not scale references. Verify measurements, material thickness, hardware fit, and allowances before cutting.
Inches to millimeters
Convert a measurement without changing the design. Enter a decimal or a fraction, such as 1 3/8.
Nominal lumber names and actual finished sizes are different. Converting units does not choose a substitute stock size.
From stock to finished project
Let’s make it.
Read the complete sequence before cutting. Mark a stage complete after its fit checks and any required glue cure.
Shape the side cheeks
- Cut a matching pair of curved sides and mark their inner faces. Transfer the top groove and pivot locations from the source drawing. Keep the two pivot holes referenced from the same lower edge, since even a small height mismatch twists the door.
Before moving onBoth profiles and pivot marks match.
House the top and back
- Cut the stopped top grooves and smaller back-panel grooves. Notch the top ends as shown so they seat without exposing the stopped groove. Stop the side back grooves at the top groove rather than running them visibly through the curved cheek tops.
Before moving onTop and back fit without leaving open slots.
Fit the pivoting front
- Dry-assemble the case to measure the door fit. Round the door’s bottom edge so it can rotate between the side panels. Leave a practical working clearance at the door ends, checking it again after sanding and before drilling its pivot axis.
Before moving onThe door clears the base through its full swing.
Assemble the case
- Glue and fasten the sides, base, back and top while keeping the opening square. After cure, drill the door pivot holes through the existing side holes. Use a dry test assembly to establish the door position rather than trying to correct the pivot alignment after the case is glued.
Before moving onThe paired pivot holes share one axis.
Install door and handle
- Retain the dowels in the side cheeks while leaving their door-bearing ends free to rotate. Fit the shaped handle and finish with a coating suitable for the intended food-storage use. Protect the rotating dowel ends from adhesive and check that the handle screws cannot emerge through the inside face.
Before moving onThe door opens freely and closes evenly against the beveled top.
1 / 5
Progress and notes stay in this browser. Nothing is uploaded.
Source notes.
- Original PDF
- Bread Box.pdf
- Source length
- 3 pages
- Attribution
- Collection copyright 2004 Martian Auctions; original authorship unverified.
- This edition
- 116 Studio · Original written companion and AI concept image · November 2026
Page references count from the first page of this PDF. The original is retained in the owner’s private woodworking collection; it is not distributed by this website. Consult it for full drawings, templates, and details beyond this companion.
Historical plans can omit essential context. Source references identify where a detail came from; they do not certify the design or replace current manufacturer instructions or applicable professional review.
More from this corner of the shop.
Boxes & small projects
Raised-Letter Address Plaque
A wood house sign combines individually fretted letters with a beveled backing board.
Intermediate5 stages
Boxes & small projects
One-Drawer Bandsaw Box
A single wooden block becomes a rounded little case and a matching pull-out drawer.
Intermediate5 stages

Boxes & small projects
Arched Bathroom Mirror
A narrow timber mirror frame has a gently peaked curved top and doweled corner joints.
Intermediate5 stages