A hollow tapered post and fitted corbels require advanced woodworking.
Project library / Boxes & small projects
Boxes & small projects / Design study
Mission Floor Lamp
An oak floor-lamp body with a tapered square post, sweeping corbels and a layered square base.
Advanced5 stages6-page source
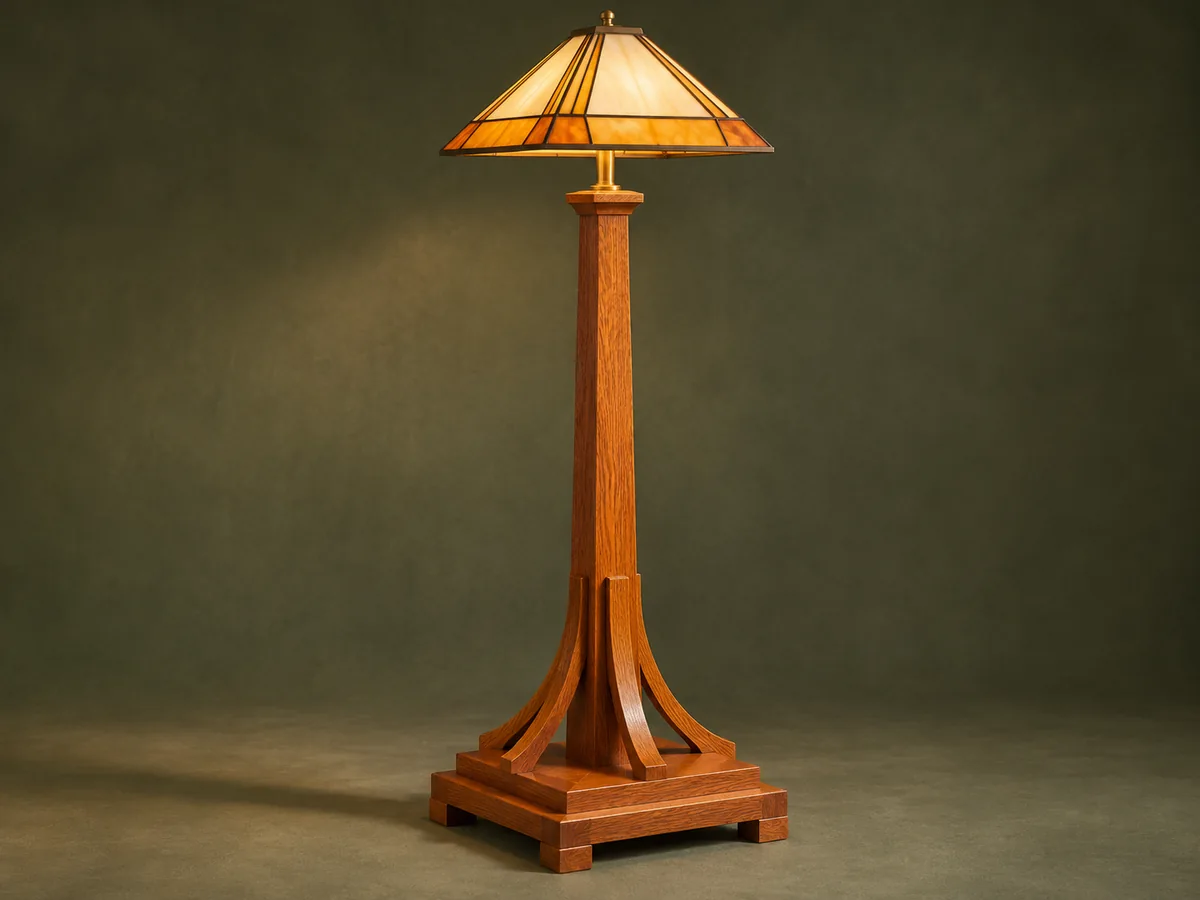
Design review required. Wood-body planning guide; electrical component compatibility, assembly and testing remain required. This guide has not been shop-tested.
Understand the project
What makes this build.
A hollow tapered post and fitted corbels require advanced woodworking.
Electrical work needs current components and competent verification.
Points to resolve before building
- The archival wiring sequence omits modern verification details and is not a complete electrical assembly guide.
Prepare the workbench
Materials & tools.
Check what you have, then confirm stock sizes and hardware against your chosen dimensions.
Materials checklist
Tools & operations
- Saw
- Bandsaw or jigsaw
- Router
- Drill
- Plane
- Clamps
Tool choices may include practical editorial suggestions. Use workholding and guarding appropriate to the actual machine and operation.
Choose dry, sound stock and test unfamiliar joints in scrap. Keep guards, push aids, eye protection, and dust control appropriate to the work.
Keep the numbers close
Measurements to know.
Selected dimensions verified from the source. This is not an automatically scaled cutting list.
| Post blank | 4 × 4 × 43¼ in | Source p. 5 |
|---|---|---|
| Base panels | 14-in and 12-in squares, each 1 in thick | Source p. 5 |
Printed diagrams and concept images are not scale references. Verify measurements, material thickness, hardware fit, and allowances before cutting.
Inches to millimeters
Convert a measurement without changing the design. Enter a decimal or a fraction, such as 1 3/8.
Nominal lumber names and actual finished sizes are different. Converting units does not choose a substitute stock size.
Read, assess & plan
Explore the construction.
Review stages explain the historical design and unresolved decisions; they are not approval to build or use it.
Choose the lamp system
- Select compatible current electrical components and shade, then check their pipe and mounting requirements against the wooden design.
Before moving onA complete listed component system is identified.
Form the hollow post
- Laminate the post halves with matching internal channels, then join them and taper the outside faces. Keep the wire path smooth and clear.
Before moving onChannel remains continuous.
Fit the cap and base
- Cut the beveled cap and two square base layers, then locate their central openings and post fasteners.
Before moving onPost stands perpendicular to the base.
Shape the corbels
- Template four matching curved brackets and fit them to the post and upper base. Add the feet and lower base layer.
Before moving onAll brackets seat without gaps.
Finish and commission
- Finish the wood before final electrical assembly. Have the lamp kit installed and checked according to its current instructions, including strain relief, insulation and lamp/shade limits.
Before moving onElectrical and stability checks are complete before use.
1 / 5
Progress and notes stay in this browser. Nothing is uploaded.
Source notes.
- Original PDF
- Floor Lamp (Mission Style).pdf
- Source length
- 6 pages
- Attribution
- Neal Barrett, Mission Style Floor Lamp, Popular Mechanics.
- This edition
- 116 Studio · Original written companion and AI concept image · November 2026
Page references count from the first page of this PDF. The original is retained in the owner’s private woodworking collection; it is not distributed by this website. Consult it for full drawings, templates, and details beyond this companion.
Historical plans can omit essential context. Source references identify where a detail came from; they do not certify the design or replace current manufacturer instructions or applicable professional review.
More from this corner of the shop.
Boxes & small projects
Raised-Letter Address Plaque
A wood house sign combines individually fretted letters with a beveled backing board.
Intermediate5 stages
Boxes & small projects
One-Drawer Bandsaw Box
A single wooden block becomes a rounded little case and a matching pull-out drawer.
Intermediate5 stages
Boxes & small projects
Arched Bathroom Mirror
A narrow timber mirror frame has a gently peaked curved top and doweled corner joints.
Intermediate5 stages