The overlapping board roof requires even courses and sound weather detailing.
Project library / Garden & outdoor
Garden & outdoor / Build companion
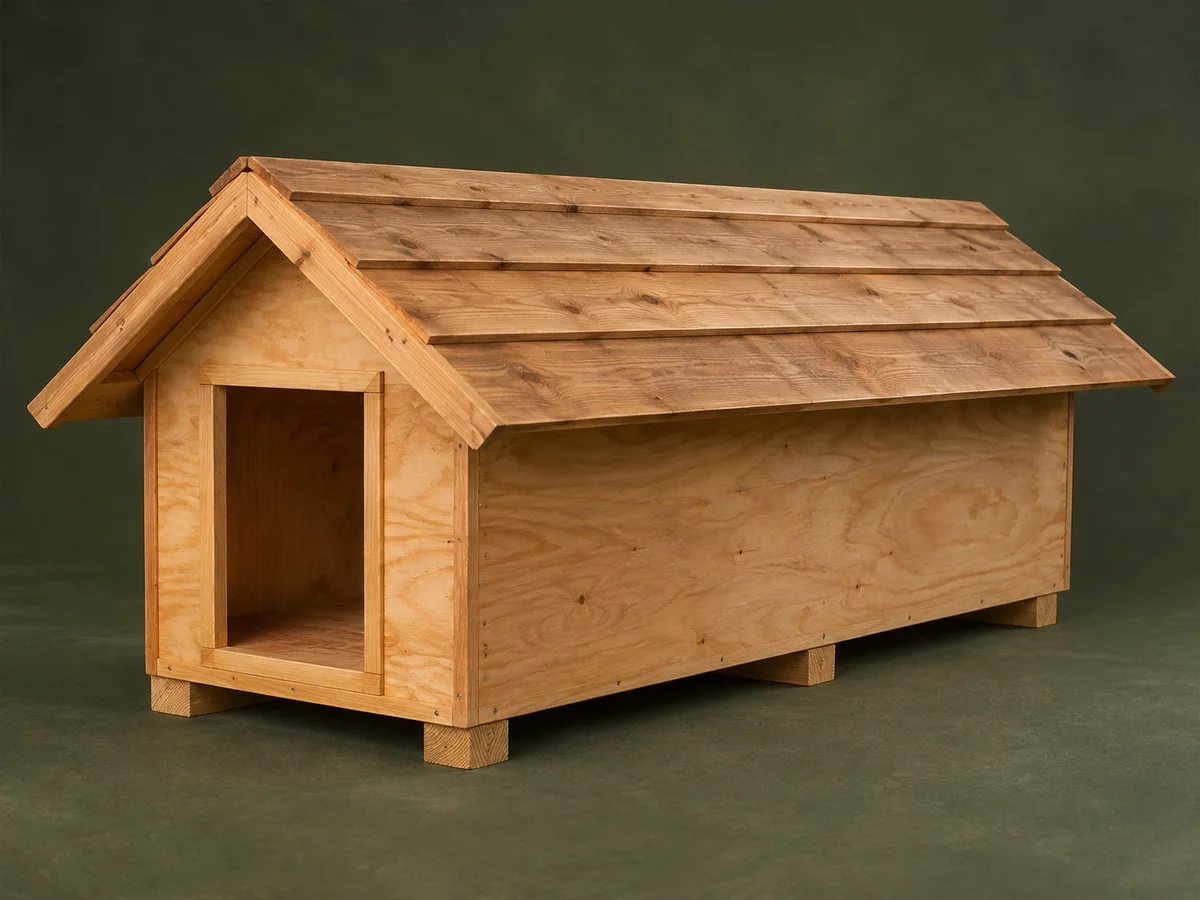
Board-Roof Kennel
A long plywood dog kennel on skids with an overlapping board gable roof.
Intermediate5 stages4-page source
A companion to the original plan. Original guide to an archival plan; not shop-tested. Check the source drawings and actual material sizes before cutting.
Understand the project
What makes this build.
The overlapping board roof requires even courses and sound weather detailing.
Three long skids keep the boarded floor off the ground.
Points to resolve before building
- Do not assume dry paint or treated floor/roof boards are safe to chew; verify all animal-contact materials.
Prepare the workbench
Materials & tools.
Check what you have, then confirm stock sizes and hardware against your chosen dimensions.
Materials checklist
Tools & operations
- Saw
- Jigsaw
- Drill
- Square
Tool choices may include practical editorial suggestions. Use workholding and guarding appropriate to the actual machine and operation.
Choose dry, sound stock and test unfamiliar joints in scrap. Keep guards, push aids, eye protection, and dust control appropriate to the work.
Keep the numbers close
Measurements to know.
Selected dimensions verified from the source. This is not an automatically scaled cutting list.
| Overall reported | 840 mm high × 780 mm wide × 1200 mm long | Source p. 1 |
|---|---|---|
| Floor | 780 × 1200 mm | Source p. 3 |
Printed diagrams and concept images are not scale references. Verify measurements, material thickness, hardware fit, and allowances before cutting.
Inches to millimeters
Convert a measurement without changing the design. Enter a decimal or a fraction, such as 1 3/8.
Nominal lumber names and actual finished sizes are different. Converting units does not choose a substitute stock size.
From stock to finished project
Let’s make it.
Read the complete sequence before cutting. Mark a stage complete after its fit checks and any required glue cure.
Adapt the enclosure
- Measure the dog and check doorway, turning room and climate needs against the plan. Resolve ventilation and cleaning access before cutting; this simple shell does not provide insulation. Choose the doorway position and siting together so prevailing weather does not blow directly into the animal’s resting space.
Before moving onThe enclosure suits the actual animal and climate.
Build the skidded floor
- Space the three skids evenly and attach the eight floorboards across them. Check the finished rectangle before using it as the reference for the wall frames. Keep the skid ends aligned and check that fasteners cannot project through the floor where the animal will lie.
Before moving onFloor is square and evenly supported.
Frame the walls
- Build matching front and rear frames with the doorway gap left clear. Stand them at the floor ends, connect the side top plates and keep temporary braces in place while squaring. Compare the two frame diagonals before adding the side connections so the plywood cladding does not lock in a twist.
Before moving onFront/rear walls are parallel and plumb.
Apply the wall panels
- Cut the plywood cladding to the supplied pattern and smooth the doorway. Fasten the panels to the framing, sealing their edges with a suitable coating system. Dry-position adjoining sheets before fastening, checking that their edges land on framing and the doorway remains unobstructed.
Before moving onNo sharp plywood edges or fasteners are exposed inside.
Roof and finish
- Fit the paired rafters and work upward with overlapping roof boards, keeping the end overhangs equal. Finish only with products appropriate to animal housing and inspect the interior before use. Check the overlapping boards shed water toward the eaves and inspect their underside for exposed fastener points.
Before moving onRoof sheds water and the interior is dry and ventilated.
1 / 5
Progress and notes stay in this browser. Nothing is uploaded.
Source notes.
- Original PDF
- Kennel Plans.pdf
- Source length
- 4 pages
- Attribution
- Collection copyright 2004 Martian Auctions; original authorship unverified
- This edition
- 116 Studio · Original written companion and AI concept image · November 2026
Page references count from the first page of this PDF. The original is retained in the owner’s private woodworking collection; it is not distributed by this website. Consult it for full drawings, templates, and details beyond this companion.
Historical plans can omit essential context. Source references identify where a detail came from; they do not certify the design or replace current manufacturer instructions or applicable professional review.
More from this corner of the shop.
Garden & outdoor
Adjustable Plant Shelves
A tall open plant stand has slatted shelves that slide on four uprights and lock at different heights with wooden pegs.
Intermediate6 stages
 Design study
Garden & outdoor
Lattice Arbor Bench
A garden seat sits between lattice side panels beneath an open pergola roof.
Advanced6 stages
Garden & outdoor
Two-Tier Garden Trolley
A push trolley carries two slatted trays on a timber frame with two wheels and a dowel handle.
Intermediate6 stages