A simple panel still supports a motorized cutter and requires mechanical review.
Project library / Workshop
Workshop / Design study
Portable Router Top
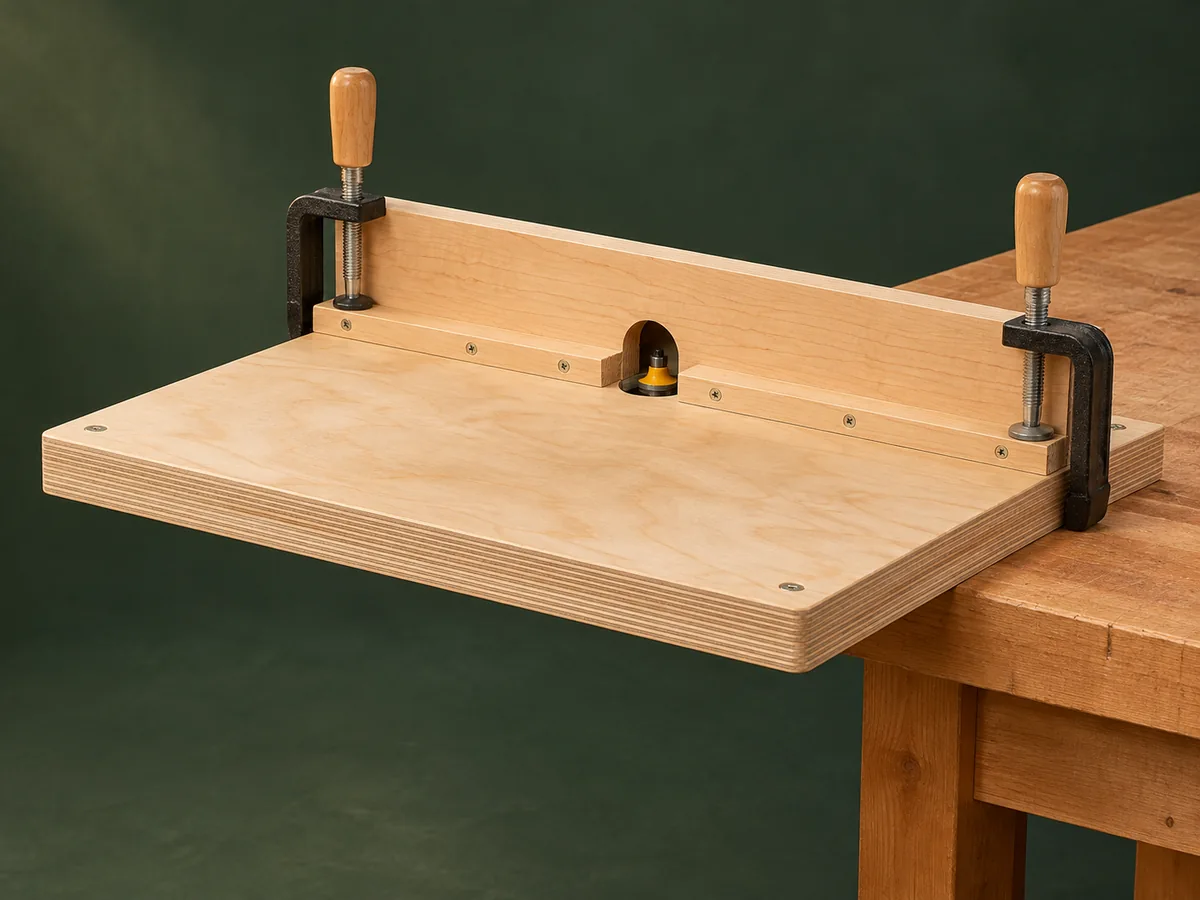
An eighteen-inch square router-table top with a clamp-on wooden fence, intended to mount on a separate bench.
Intermediate5 stages1-page source
Design review required. Planning overview, not a shop-tested or construction-ready plan. Planning only: the one-page source lacks complete guarding and electrical-control details. Support and clamps must remain secure with the router hanging below the panel.
Understand the project
What makes this build.
A simple panel still supports a motorized cutter and requires mechanical review.
The fence is removable and held by a clamp at each end.
The original design is portable and has no integral legs.
Points to resolve before building
- Planning only: the one-page source lacks complete guarding and electrical-control details.
- Support and clamps must remain secure with the router hanging below the panel.
Prepare the workbench
Materials & tools.
Check what you have, then confirm stock sizes and hardware against your chosen dimensions.
Materials checklist
Tools & operations
- Saw
- Drill and countersink
- Clamps
- Router
Tool choices may include practical editorial suggestions. Use workholding and guarding appropriate to the actual machine and operation.
Choose dry, sound stock and test unfamiliar joints in scrap. Keep guards, push aids, eye protection, and dust control appropriate to the work.
Keep the numbers close
Measurements to know.
Selected dimensions verified from the source. This is not an automatically scaled cutting list.
| Tabletop | 18 × 18 × ¾ inches | Source p. 1 |
|---|---|---|
| Fence opening in source | 2 inches wide × 1½ inches high; adapt to actual approved setup. | Source p. 1 |
Printed diagrams and concept images are not scale references. Verify measurements, material thickness, hardware fit, and allowances before cutting.
Inches to millimeters
Convert a measurement without changing the design. Enter a decimal or a fraction, such as 1 3/8.
Nominal lumber names and actual finished sizes are different. Converting units does not choose a substitute stock size.
Read, assess & plan
Explore the construction.
Review stages explain the historical design and unresolved decisions; they are not approval to build or use it.
Check mounting compatibility
- Confirm that the router manufacturer permits inverted use and identify suitable mounting screws. Plan guarding, a power disconnect and dust extraction before building.
Before moving onRequired machine provisions are resolved.
Prepare the top
- Cut a flat square panel and mark the center with diagonals. Use the actual router base as the hole-position reference.
Before moving onMounting layout matches the specific router.
Fit the mounting holes
- Drill only the approved layout and countersink the top face. Verify thread engagement and plate strength with the router unplugged.
Before moving onScrews are secure and do not project into the work path.
Make the clamp-on fence
- Join the face to its two base pieces at a true right angle. Size the bit-clearance opening for the planned guarded setup rather than assuming the source notch fits every bit.
Before moving onFence remains straight and locks at both ends.
Review the support and operation
- Clamp the table to a stable support with clear space below the router. Have the complete assembly reviewed before powered use and prepare a suitable push block.
Before moving onThe table cannot tip, lift or slide under anticipated feed forces.
1 / 5
Progress and notes stay in this browser. Nothing is uploaded.
Source notes.
- Original PDF
- Quick and Easy Router Table.pdf
- Source length
- 1 pages
- Attribution
- Archived Quick and Easy Router Table article; original author not established.
- This edition
- 116 Studio · Original written companion and AI concept image · November 2026
Page references count from the first page of this PDF. The original is retained in the owner’s private woodworking collection; it is not distributed by this website. Consult it for full drawings, templates, and details beyond this companion.
Historical plans can omit essential context. Source references identify where a detail came from; they do not certify the design or replace current manufacturer instructions or applicable professional review.
More from this corner of the shop.
Workshop
Adjustable Studio Easel
A tall H-frame easel has a pegged canvas shelf, sliding top clamp and hinged rear tilt supports.
Intermediate6 stages
Workshop
Angled Router-Bit Shelf
A sloping drilled shelf presents router bits and other shanked accessories against a wall backboard.
Beginner5 stages
Workshop
Classic Wooden Bow Saw
An ash H-frame tensions a narrow saw blade with twisted cord and turned maple handles.
Advanced5 stages