Multiple drawer bays and door clearances require accurate cabinet layout.
Project library / Workshop
Workshop / Build companion
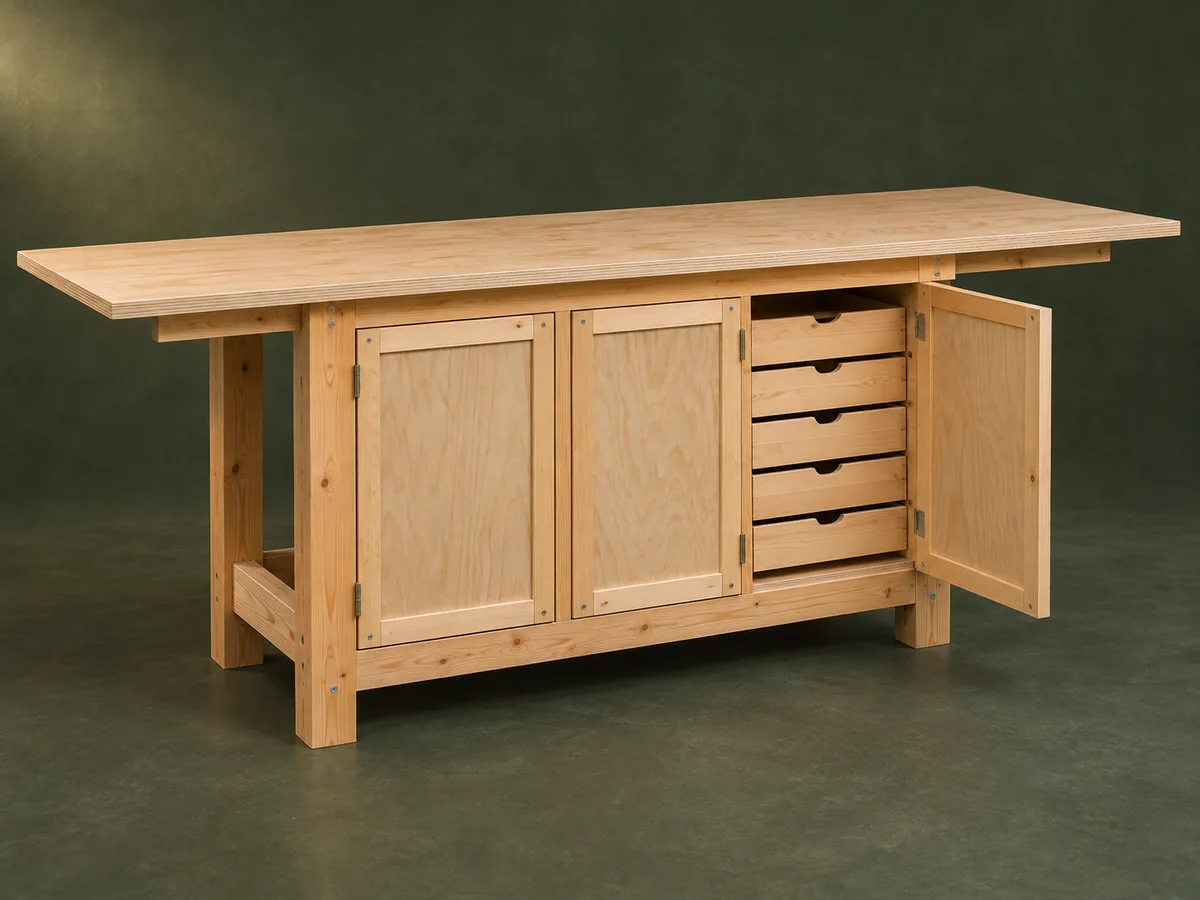
Hidden Drawer Workbench
A long plywood-top workbench with three cupboard doors concealing eight simple storage drawers.
Intermediate6 stages4-page source
A companion to the original plan. Original reading guide based on the archived plan; not shop-tested. Confirm diagram dimensions against the private source before cutting.
Understand the project
What makes this build.
Multiple drawer bays and door clearances require accurate cabinet layout.
Eight simple drawers sit behind three paneled doors.
The top projects substantially beyond the shorter storage case.
Points to resolve before building
- The source has ambiguous support labels; reconcile joints against the diagrams before cutting.
- No heavy-machine or vise capacity is established for the thin plywood top.
Prepare the workbench
Materials & tools.
Check what you have, then confirm stock sizes and hardware against your chosen dimensions.
Materials checklist
Tools & operations
- Saw
- Router
- Drill
- Clamps
- Sander
Tool choices may include practical editorial suggestions. Use workholding and guarding appropriate to the actual machine and operation.
Choose dry, sound stock and test unfamiliar joints in scrap. Keep guards, push aids, eye protection, and dust control appropriate to the work.
Keep the numbers close
Measurements to know.
Selected dimensions verified from the source. This is not an automatically scaled cutting list.
| Worktop | ½ × 27¼ × 92 inches | Source p. 1 |
|---|---|---|
| Legs | Four 2×4 members at 28½ inches | Source p. 1 |
| Storage arrangement | Three drawers at each side and two in the center | Source p. 2 |
Printed diagrams and concept images are not scale references. Verify measurements, material thickness, hardware fit, and allowances before cutting.
Inches to millimeters
Convert a measurement without changing the design. Enter a decimal or a fraction, such as 1 3/8.
Nominal lumber names and actual finished sizes are different. Converting units does not choose a substitute stock size.
From stock to finished project
Let’s make it.
Read the complete sequence before cutting. Mark a stage complete after its fit checks and any required glue cure.
Check the long-top layout
- Map the ninety-two-inch top over the shorter cabinet base and confirm the intended overhangs. Review the thin top and support spacing for the work or vise loads actually planned. Confirm where a vise would attach before adding one; the plan’s unsupported overhang is not itself a verified mounting structure.
Before moving onA consistent support layout and intended load are defined.
Build side and divider assemblies
- Join the outer plywood sides to their legs and prepare the central framed divider panels. Keep paired panels square and mark drawer-runner heights from one base reference. Install runner components while the panels are still easy to reach, keeping left and right hardware oriented correctly for each drawer bay.
Before moving onAll four vertical assemblies have aligned runner locations.
Fit the lapped upper rails
- Cut the half-lap positions from the actual assemblies rather than relying on ambiguous support labels. Dry-fit long rails and end members, then secure the square structure. The source reuses similar names for different supports, so label every joint by its physical position on the dry assembly.
Before moving onRail joints close and panels stand parallel.
Install the top and back
- Fasten the plywood worktop to its support frame and fit the hardboard rear dust panel if used. Ease exposed sheet edges and verify that the case resists racking. Keep back fasteners clear of drawer travel and leave access where required for runner adjustment or later maintenance.
Before moving onThe top is flat and the rear panel clears the drawers.
Build eight fitted drawers
- Assemble the simple drawer boxes square and fit their bottoms. Size them to the clearances required by the actual runners, keeping the center pair distinct from the side sets. Build one drawer as a trial before batching all eight, checking slide clearance with the actual hardware rather than the nominal opening width.
Before moving onEach drawer travels freely in its assigned opening.
Fit the three doors
- Make the mitered pine frames and plywood panels, checking that neighboring door edges clear each other. Fit hinges, knobs and the upper trim, then finish and inspect the completed bench. Open each door far enough to withdraw its drawers completely, and adjust hinges before fitting the trim that could limit that access.
Before moving onAll doors open fully and every hidden drawer is accessible.
1 / 6
Progress and notes stay in this browser. Nothing is uploaded.
Source notes.
- Original PDF
- Work Bench 1.pdf
- Source length
- 4 pages
- Attribution
- Archived Workbench guide, source filename Work Bench 1.pdf.
- This edition
- 116 Studio · Original written companion and AI concept image · November 2026
Page references count from the first page of this PDF. The original is retained in the owner’s private woodworking collection; it is not distributed by this website. Consult it for full drawings, templates, and details beyond this companion.
Historical plans can omit essential context. Source references identify where a detail came from; they do not certify the design or replace current manufacturer instructions or applicable professional review.
More from this corner of the shop.
Workshop
Adjustable Studio Easel
A tall H-frame easel has a pegged canvas shelf, sliding top clamp and hinged rear tilt supports.
Intermediate6 stages
Workshop
Angled Router-Bit Shelf
A sloping drilled shelf presents router bits and other shanked accessories against a wall backboard.
Beginner5 stages
Workshop
Classic Wooden Bow Saw
An ash H-frame tensions a narrow saw blade with twisted cord and turned maple handles.
Advanced5 stages